How to Photograph Food While Traveling: Pro Tips Without Pro Camera Gear
Keep Reading
- Bangkok Street Food vs Restaurants — Where to Eat and How Much It Costs
- Singapore Hawker Centers Ranked — Where Locals Actually Eat for $3
- Istanbul Beyond Kebabs — A Food Guide to What Locals Actually Eat
Half my camera roll from 15 countries is food, and the secret to good food photos is a window seat, no flash, and getting close.
In This Post
I did not set out to become a food photographer. But after eating my way through Istanbul, Tokyo, Bali, and a dozen other cities, I realized that half my camera roll was food. And most of it was terrible.
Flat lighting, cluttered backgrounds, weird angles that made a beautiful plate of cacio e pepe look like hospital cafeteria food. Here is what I changed.
The Window Seat Rule
When you sit down at a restaurant, ask for a table near the window. Natural side lighting is the single biggest factor in whether a food photo looks appetizing or clinical. Light hitting the plate from the side creates shadows that give food dimension and texture.
No camera gear at all? Start with phone photography tips for travel — the iPhone alone goes further than people think.
If there is no window, sit so that overhead lighting comes from one direction rather than directly above. Direct overhead light flattens everything.
In Rome, the best trattorie have tiny tables crammed near windows — annoying for elbows, perfect for food shots.
Turn Off Your Flash — Forever
Flash makes food look greasy, washed out, and institutional. There is no scenario where flash improves a food photo. If it is too dark, bump up your exposure manually (tap the screen and slide up on iPhone) or find a brighter spot. Even dim natural light produces better results than flash.
The Three Angles That Work
45 degrees (the hero angle): Hold your phone at roughly 45 degrees to the plate, mimicking the angle at which you actually see your food when seated. This works for 80% of dishes — bowls of ramen, stacked burgers, plated entrees.
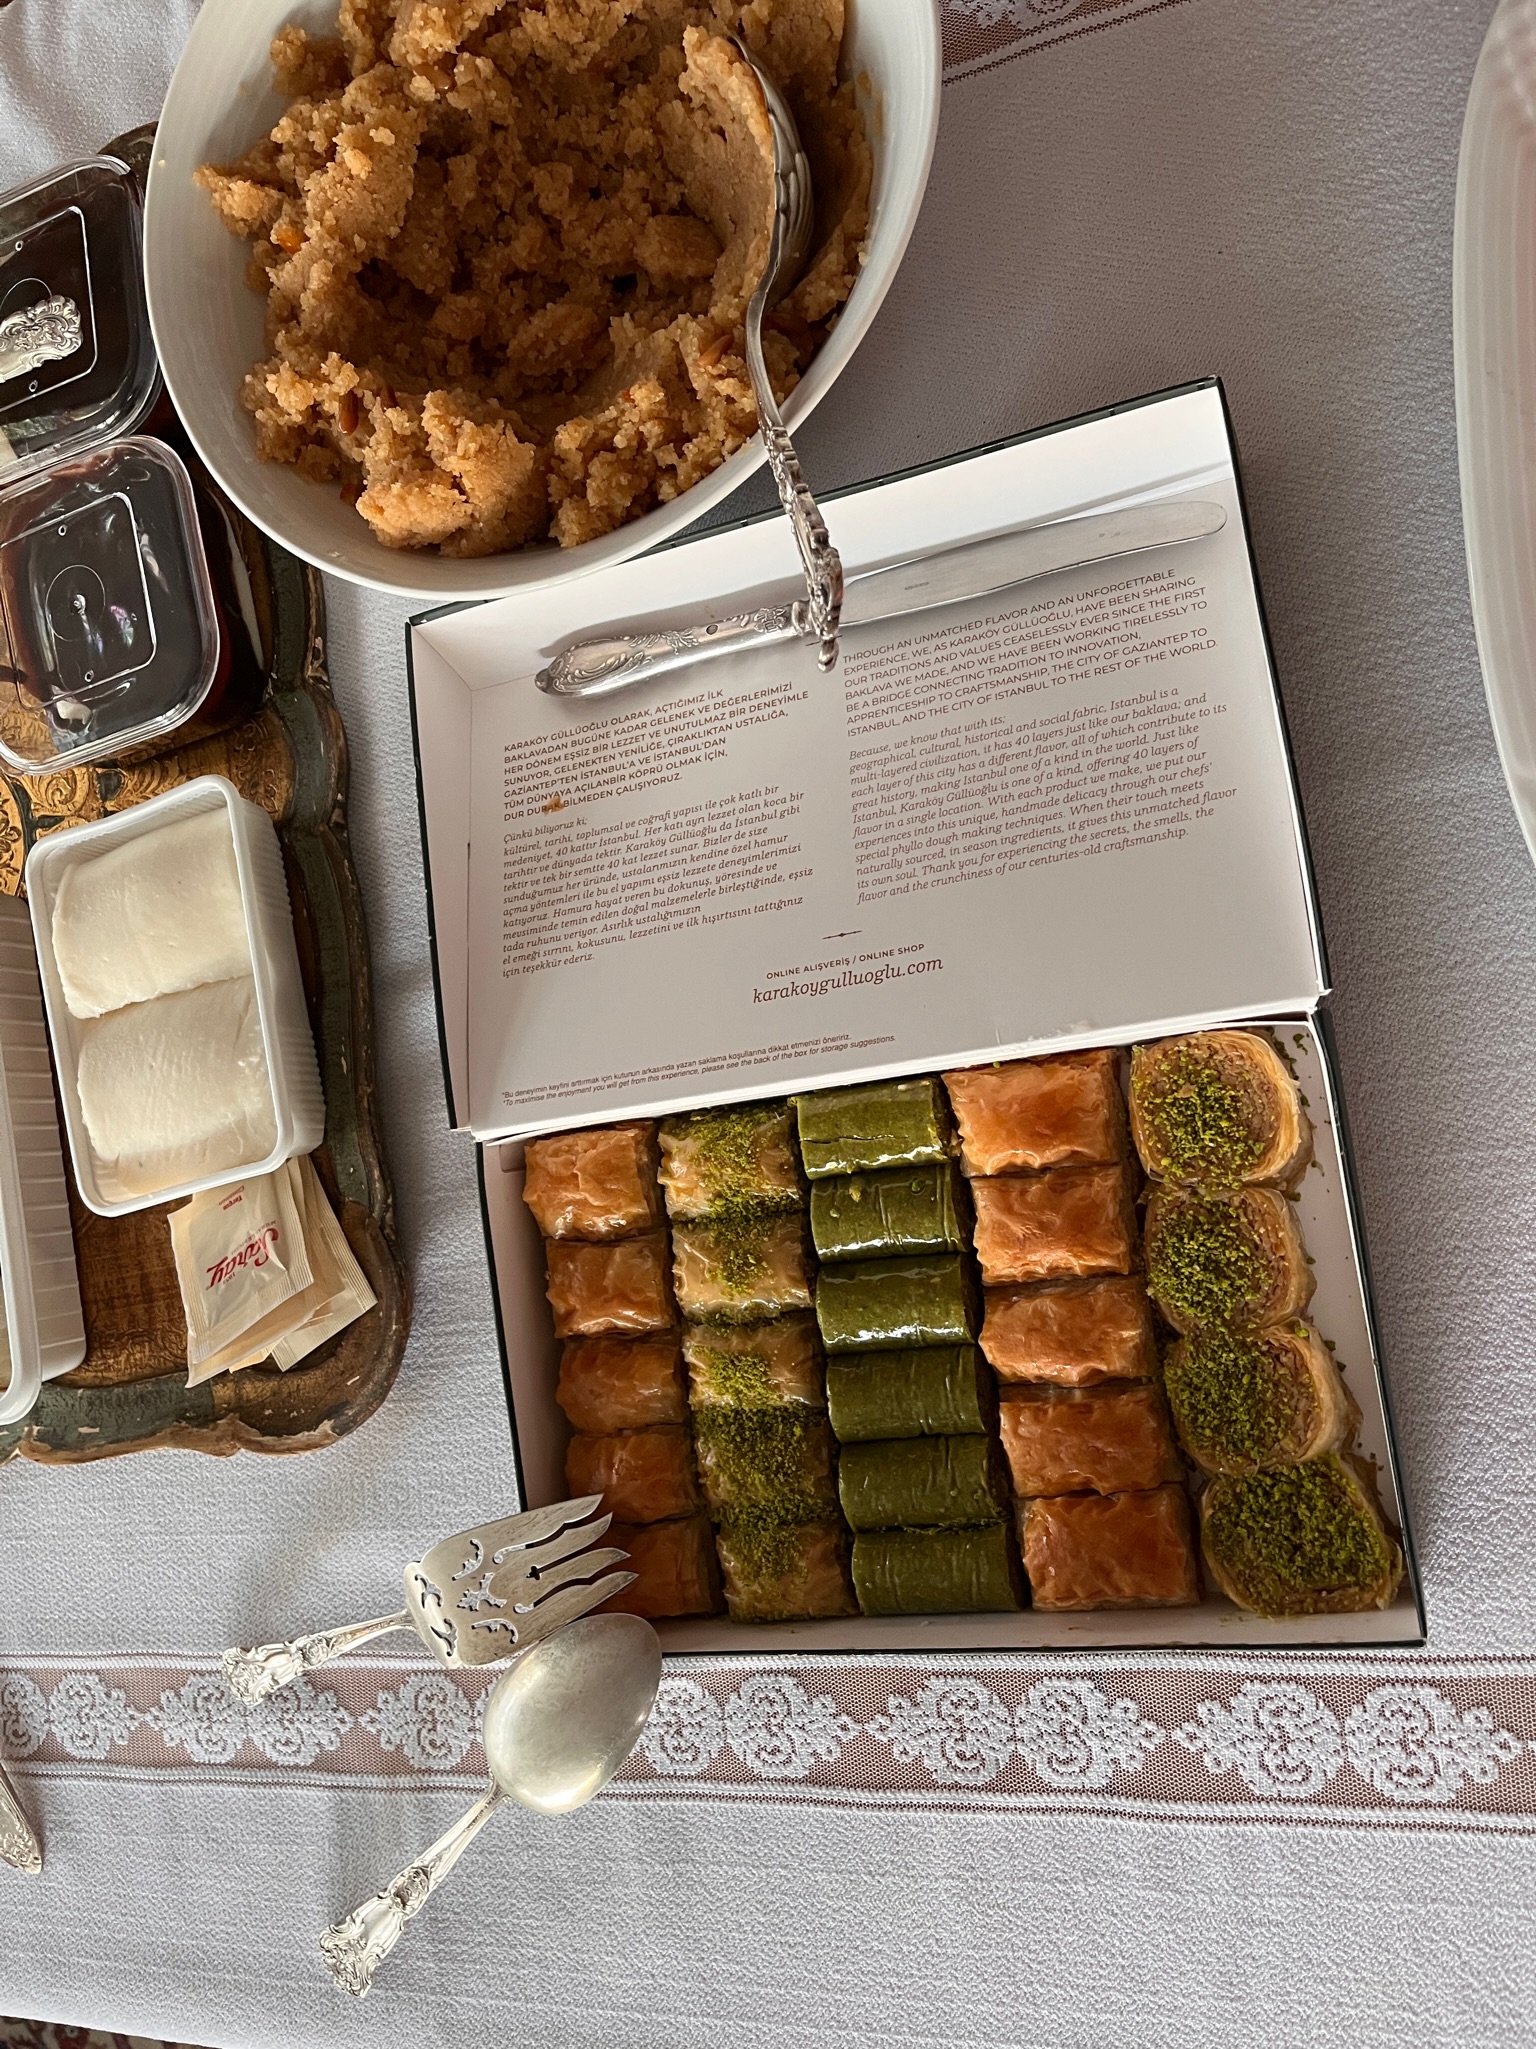
Directly overhead (flat lay): Hold your phone parallel to the table, straight above the plate. Works best for flat presentations — pizza, sushi platters, meze spreads, anything arranged on a board. In Istanbul, the breakfast spreads at kahvalti spots are designed for this angle.
Eye level: Hold your phone at table height, parallel to the ground. Works for drinks, tall desserts, stacked items, and anything with layers you want to show off. Great for those towering ice cream cones in Italy.
Clean the Scene
Before you shoot, move the napkins, clear the salt shaker, push aside the menu. A clean background with just the plate (and maybe a fork or drink for context) looks ten times better than a cluttered table.
The exception: market stalls and street food. Here, the surrounding chaos is the story. Include the vendor’s hands, the grill, the steam, the crowd. Context matters more than cleanliness for street food shots.
Shoot Before You Eat
This is not about being precious. It is about timing. Food looks best in the first 30 seconds after it arrives — steam is still rising, cheese is still melted, greens have not wilted. I give myself 15 seconds max, take 5-8 shots, then put the phone away.
If you spend five minutes styling and shooting while your dining companion watches their food cool, you have become the person everyone hates. Do not become that person.
Get Close With Portrait Mode
Portrait mode blurs the background and makes your dish the star. It works remarkably well for single plates, especially if there is some distance between the plate and the background. The blur hides ugly restaurant decor, neighboring tables, and that guy behind you checking his phone.
Editing Food Photos
I use Lightroom Mobile (free version) for all food edits. Here is my two-minute workflow:
- Increase warmth slightly — food looks better warm. Add +10 to +15 on the temperature slider.
- Boost vibrance (not saturation) — vibrance lifts muted colors without making everything look neon. +15 to +25 is plenty.
- Add a touch of clarity — +10 to +20 sharpens textures (bread crust, meat char, vegetable edges) without looking overdone.
- Darken shadows slightly — this adds depth and makes colors look richer. -10 to -20 on the shadows slider.
- Crop tight — remove any remaining clutter at the edges.
Total editing time: under two minutes. Do not over-filter. Food that looks natural and warm beats food that looks like it was shot through a Instagram filter from 2014. See my full photo editing workflow.
Street Food Photography Tips
Street food is harder to photograph because you are standing, it is often dark, and you are holding the food with one hand and your phone with the other.
My approach:
- Hold the food at arm’s length with the sky or a blank wall behind it. This isolates the food from visual noise.
- If there is a neon sign or colorful awning nearby, use it as a background. The contrast between street grit and beautiful food tells a story.
- Shoot the process. Vendors grilling satay, pulling noodles, or assembling banh mi are more interesting than the final product.
In Bangkok‘s Yaowarat Chinatown, the best photos are not of the food — they are of the smoke rising from woks backlit by bare bulbs.
What Gear Helps
- Joby GorillaPod mini tripod — set it on the table for overhead shots without arm strain. Around $30.
- Small LED light panel — a pocket-sized fill light for dark restaurants. Clip it to a glass or prop it up. Under $20 and it saves dim dinner shots.
- Phone lens cleaning cloth — sounds trivial, costs $5, and prevents greasy-lens syndrome that plagues every food photo ever.
The Real Secret
The food photos that perform best on this blog are never the most technically perfect. They are the ones that make you hungry. If looking at the photo makes you want to book a flight and eat that exact dish, the photo did its job.
Stop chasing perfect composition and start chasing good light and honest moments. A bowl of tom yum shot in a cramped Bangkok street stall with steam curling into frame will outperform a professionally styled studio shot every single time.
Tours: Istanbul tours on Viator
Activities: Japan on Klook
Frequently Asked Questions
How do you photograph food in a restaurant without being awkward?
Be quick and discreet. Position near a window for natural light, turn off your flash, take 3-4 shots from different angles within 30 seconds, then put the phone away. Most restaurants do not mind brief phone photography.
What is the best lighting for food photography?
Natural window light is the gold standard. Sit near a window and position the plate so light comes from the side or behind the food. Never use flash, which flattens textures and creates harsh shadows.
What angle works best for food photos?
Three angles cover most dishes: 45 degrees (the classic plate shot), directly overhead (great for flat dishes and spreads), and eye-level (best for tall dishes like burgers or layered desserts).
Get Travel Tips That Actually Help
Real costs, honest reviews, and what I’d do differently — delivered to your inbox.
No spam. Unsubscribe anytime.
Share This Post
Travel Tools We Use
Affiliate links — we earn a small commission at no extra cost.
Written by Jenna Fattah
I have visited 25+ countries across 6 continents, attended 7 Formula 1 races, and spent 4 years writing about what actually works and what I would do differently. Every recommendation on this site comes from trips I planned and paid for myself. Read more about me